Work Orders
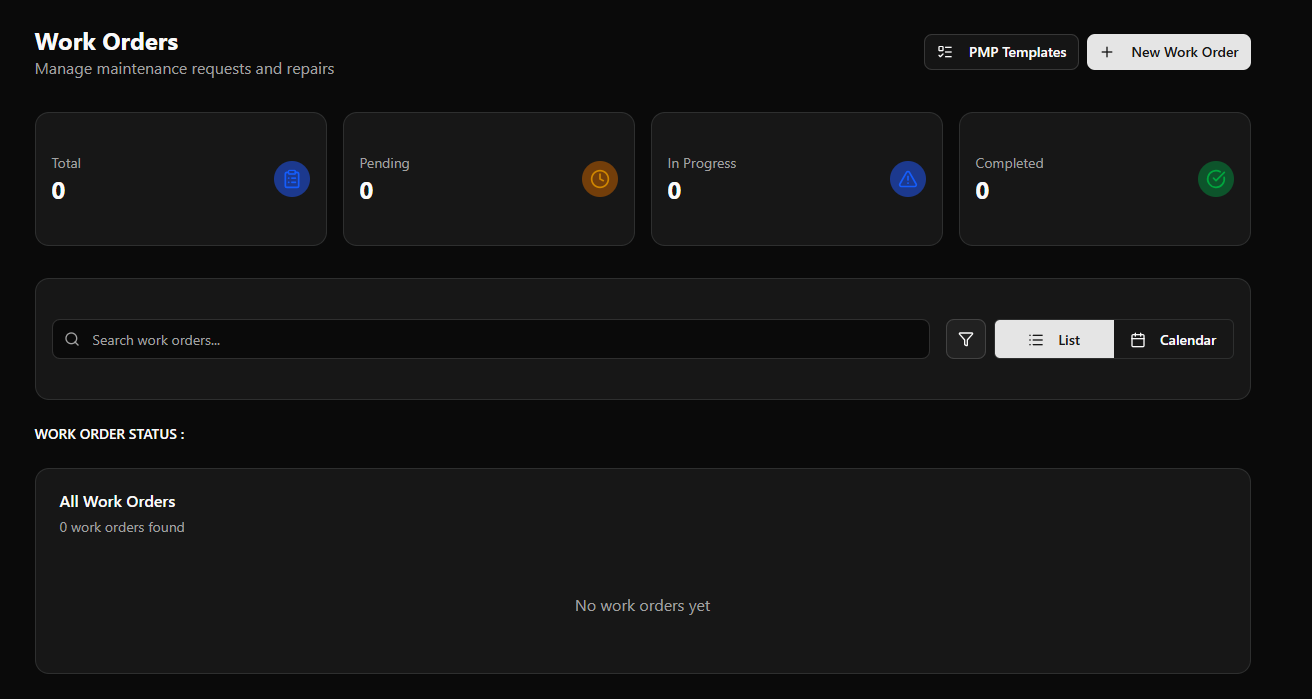
The Work Orders module is the core of M2’s maintenance operations. It tracks every maintenance task from creation to completion, with list and calendar views plus a direct link to PMP Templates.
Page Header
Section titled “Page Header”| Element | Description |
|---|---|
| Title | Work Orders |
| Subtitle | Manage maintenance requests and repairs |
| PMP Templates button | Opens the Preventive Maintenance Templates page |
| + New Work Order button | Opens the New Work Order form |
Status KPI Cards
Section titled “Status KPI Cards”Four summary cards appear at the top of the page:
| Card | Color | Description |
|---|---|---|
| Total | Blue | All work orders in the system |
| Pending | Amber | Work orders awaiting assignment |
| In Progress | Blue | Work orders currently being worked on |
| Completed | Green | Finished work orders |
Search & View Controls
Section titled “Search & View Controls”| Control | Description |
|---|---|
| Search work orders… | Full-text search across all work order fields |
| Filter icon | Apply filters (status, priority, villa, category, etc.) |
| List | Table view — default display |
| Calendar | Calendar view — see work orders scheduled over time |
Work Order Status Panel
Section titled “Work Order Status Panel”Below the search bar, a WORK ORDER STATUS : label introduces the main content area.
List View
Section titled “List View”Displays all work orders in a table. When no work orders exist, shows:
All Work Orders 0 work orders found No work orders yet
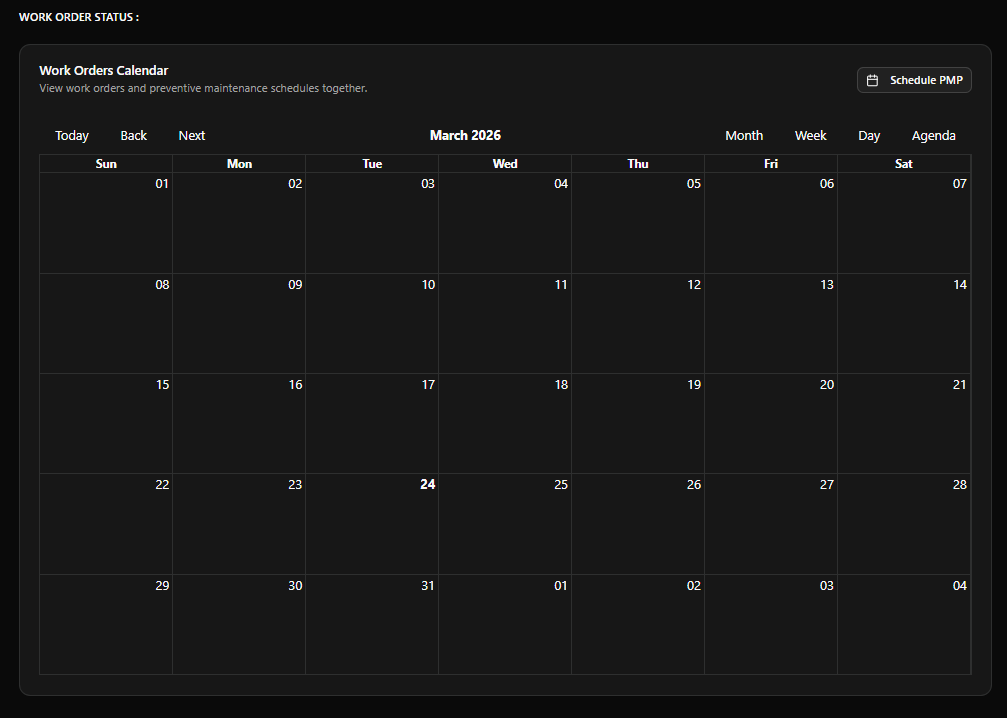
Calendar View
Section titled “Calendar View”Switches to the Work Orders Calendar — a full monthly calendar that shows:
- Scheduled work orders plotted on their due dates
- Preventive maintenance (PMP) schedules alongside work orders
- Navigation: Today, Back, Next buttons
- View options: Month, Week, Day, Agenda
- Schedule PMP button (top right) — shortcut to create a new PMP schedule
New Work Order Form
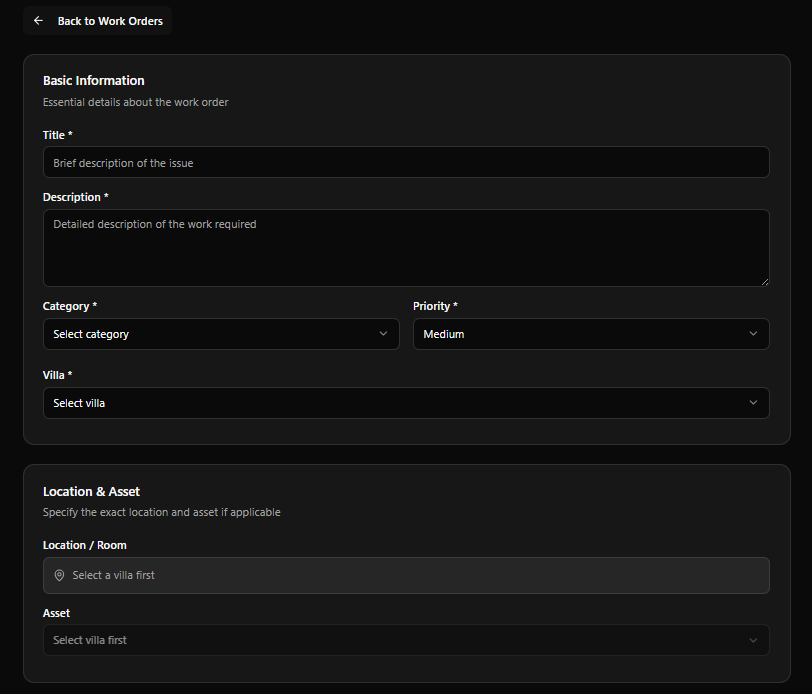
Section titled “New Work Order Form”Access via + New Work Order button. A back link (← Back to Work Orders) is shown at the top.
The form is divided into six sections:
1. Basic Information
Section titled “1. Basic Information”Essential details about the work order
| Field | Required | Notes |
|---|---|---|
| Title | Yes | Brief description of the issue |
| Description | Yes | Detailed description of the work required |
| Category | Yes | Maintenance category (dropdown) |
| Priority | Yes | Default: Medium |
| Villa | Yes | Select the property this WO belongs to |
2. Location & Asset
Section titled “2. Location & Asset”Specify the exact location and asset if applicable
Location and Asset fields remain disabled until a villa is selected.
| Field | Notes |
|---|---|
| Location / Room | Specific room or area within the selected villa |
| Asset | Related equipment or asset (optional) |
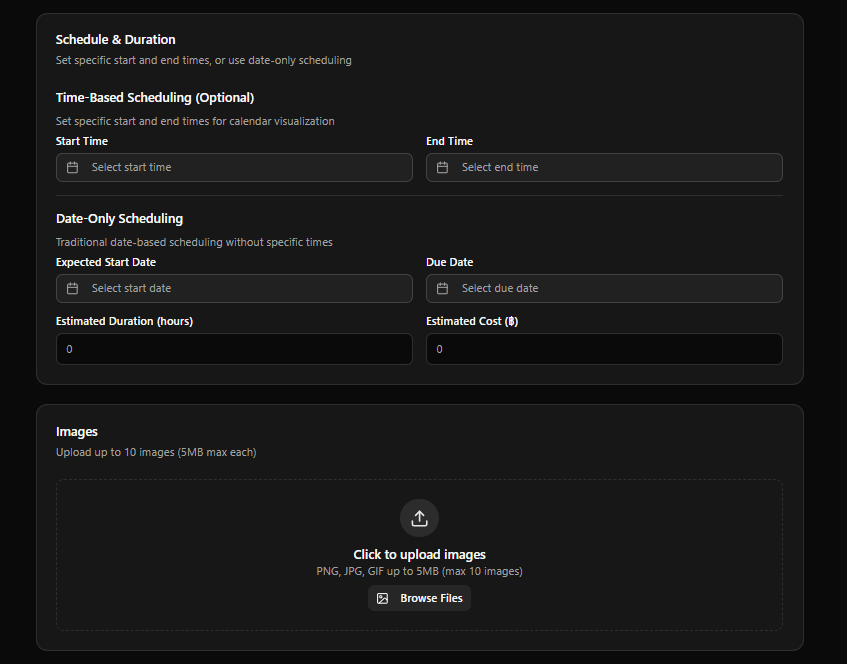
3. Schedule & Duration
Section titled “3. Schedule & Duration”Set specific start and end times, or use date-only scheduling
Time-Based Scheduling (Optional)
Section titled “Time-Based Scheduling (Optional)”Set specific start and end times for calendar visualisation
| Field | Notes |
|---|---|
| Start Time | Datetime picker |
| End Time | Datetime picker |
Date-Only Scheduling
Section titled “Date-Only Scheduling”Traditional date-based scheduling without specific times
| Field | Notes |
|---|---|
| Expected Start Date | Date picker |
| Due Date | Date picker |
| Estimated Duration (hours) | Numeric, default 0 |
| Estimated Cost (฿) | Numeric, default 0 |
4. Images
Section titled “4. Images”Upload up to 10 images (5MB max each)
| Spec | Detail |
|---|---|
| Accepted formats | PNG, JPG, GIF |
| Max file size | 5 MB per image |
| Max images | 10 |
| Upload method | Click to upload or Browse Files |
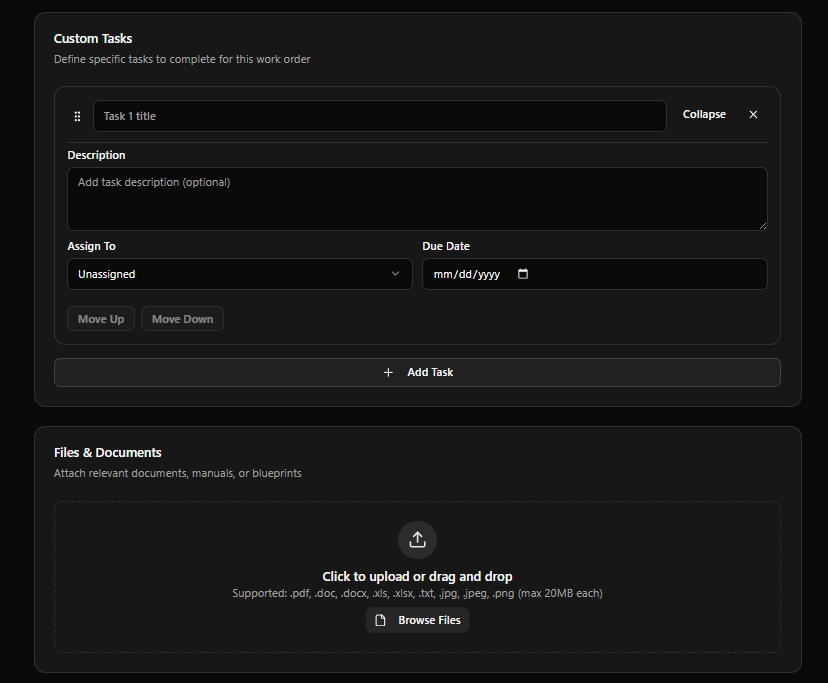
5. Custom Tasks
Section titled “5. Custom Tasks”Define specific tasks to complete for this work order
Each task has:
| Field | Notes |
|---|---|
| Task title | Short label for the task (e.g. Task 1 title) |
| Description | Optional task description |
| Assign To | Default: Unassigned — select a staff member |
| Due Date | Per-task deadline |
| Move Up / Move Down | Reorder tasks |
| Collapse / × | Collapse or remove the task |
Use + Add Task to add additional tasks. Tasks can be reordered via drag handle (⠿) or Move Up / Move Down buttons.
6. Files & Documents
Section titled “6. Files & Documents”Attach relevant documents, manuals, or blueprints
| Spec | Detail |
|---|---|
| Accepted formats | .pdf, .doc, .docx, .xls, .xlsx, .txt, .jpg, .jpeg, .png |
| Max file size | 20 MB per file |
| Upload method | Click to upload or drag and drop, or Browse Files |
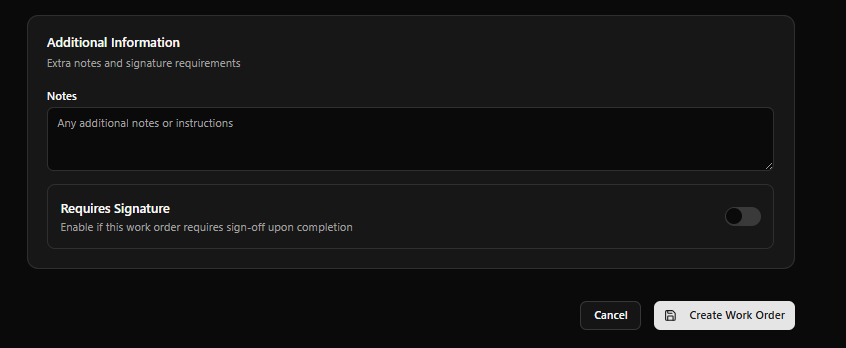
7. Additional Information
Section titled “7. Additional Information”Extra notes and signature requirements
| Field | Notes |
|---|---|
| Notes | Any additional notes or instructions (free text) |
| Requires Signature | Toggle — enable if this work order requires sign-off upon completion. Default: off |
Form Actions
Section titled “Form Actions”| Button | Action |
|---|---|
| Cancel | Discard and return to Work Orders list |
| Create Work Order | Submit the form and create the work order |
Creating a Work Order
Section titled “Creating a Work Order”flowchart TD A[Click + New Work Order] --> B[Fill Basic Information\nTitle · Description · Category · Priority] B --> C[Select Villa] C --> D[Choose Location / Room and Asset] D --> E[Set Schedule & Duration] E --> F[Upload Images optional] F --> G[Add Custom Tasks optional] G --> H[Attach Files & Documents optional] H --> I[Add Notes · Toggle Signature if needed] I --> J[Click Create Work Order] J --> K[Work Order created\nStatus: Pending]